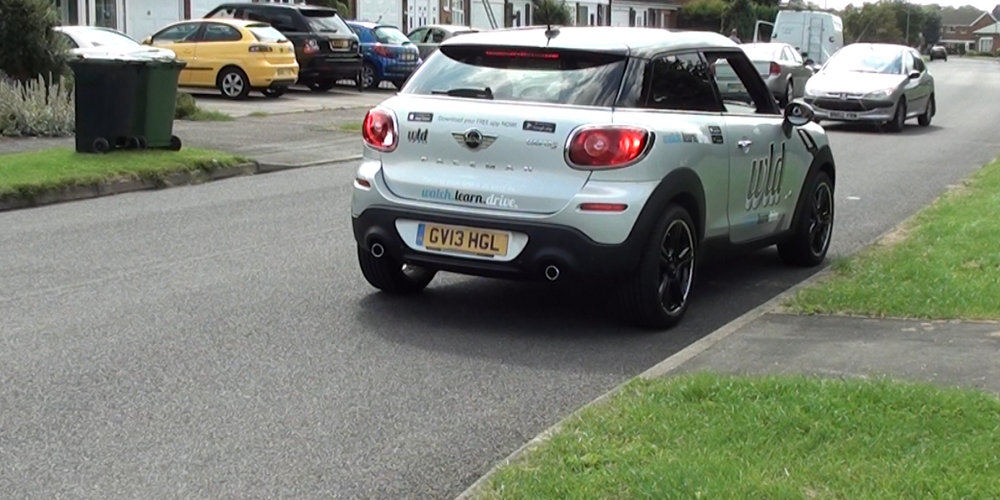
Stopping on the right was introduced to the UK driving test in late 2017 in a 'shake' up that removed some old manoeuvres.
 The manoeuvre combines stopping on the right with straight-line reversing.
It's been included in the driving test to reflect some of the everyday manoeuvring skills you'll use after passing your driving test.
This two-part manoeuvre requires you to demonstrate car control and observation skills in a slow-speed situation. Before the manoeuvre was introduced, these skills were tested with a 'three-point-turn' and reversing around a corner.
Stopping and parking on the right are not ideal, but it is often the only choice available.
Before this test manoeuvre, stopping on the right was rarely taught by driving instructors - leaving some new drivers unaware of the dangers.
Stopping safely on the right and moving off from the right are exercises that can be pretty risky (all driving has risks!) and needs care with observation and judgement of other traffic - this is why you need plenty of practise on different roads.
The Driving Test Success practical app has a full set videos covering stopping and moving off in all situations that you might encounter on your driving test and in everyday driving - Driving Test Success. (Google Play | App Store - appstore practical videos available as an in app purchase in the 4 in 1 kit)
For driving test purposes stopping on the right is combined with straight-line reversing.
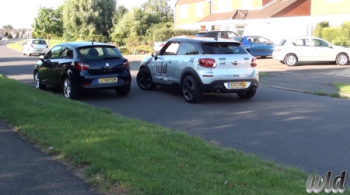
During your test, you might be asked to pull up on the right, possibly behind a parked vehicle. You will then be asked to reverse in a straight line for about two car lengths before moving off again.
Click here to revise the information about straight-line reversing.
The examiner will look for:

Good judgement of approaching traffic when moving to the right
Awareness of the following traffic before moving to the right
Correct, well-timed signals throughout the manoeuvre when required
Good observation, control and accuracy when reversing
Proper control when moving off
Safety when moving off

Driving test examiners will choose where they want you to stop; they will instruct you in plenty of time.
When you are driving on your own, you will need to find safe, legal and convenient places to park - whenever possible, you should look for a space on the left-hand side of the road because this will generally involve less risk.
Also, it's important to remember that it is illegal to park on the right at night unless on a one-way road or a designated parking space (Highway Code rule 248).
When parking on the right, be aware that your passengers might not be aware of the dagers when getting out of the car!
Back-seat passengers - especially children - should get out of the kerbside door. Warn front-seat passengers to look ahead for cyclists and around for traffic before opening their doors.
Parking on the right at night is dangerous, especially on unlit roads - because vehicles have red reflectors at the back.
On the British road system, anything that reflects red is positioned on the left-hand side of the road - for example, red cats eyes.
As a driver, when you see red reflectors at night, you will naturally assume that they are on the left - or a vehicle parked on the left. The response to a vehicle parked on the left is to move to the right - but if the vehicle is parked on the right, this would be the totally wrong thing to do! Making parking at night illegal on the right (except in designated places) reduces the risk of a driver making a wrong decision when seeing red reflectors ahead.
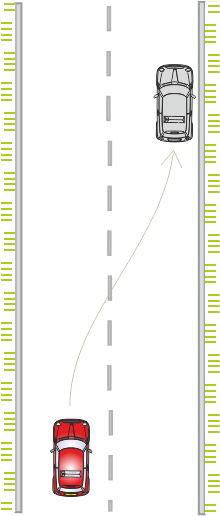
See the numbered points on the diagram below.
Check your mirrors and signal right to let other road users know your intentions. Take care with the timing of your signals to ensure that you don't mislead others into thinking that you are turning into a road or other opening on the right.
(Diagram point 1) Give way to any approaching traffic, and never rush to cross the road in front of other traffic - this could be extremely dangerous and lead to a head-on collision. . If/when the road is clear, drive slowly to your parking position. As with stopping on the left, look ahead, not at the kerb. While quick glances at the kerb might help with positioning, concentrating on the kerb will be likely to result in hitting it.

(Diagram point 2) After stopping secure the car with the handbrake and select neutral,
Before starting to reverse, ensure that the road is clear and that there are no pedestrians on the footpath. Use your straight-line reversing skills to drive back about three car lengths.
As you reverse, look well back for accurate positioning, keep glancing all around, and if other road users approach, pause until they have passed.

(Diagram point 3) After stopping secure the car and re-fasten your seatbelt if you removed it for reversing.
Take care when moving off, remembering that your main observation will be to the rear left and the road ahead - with this in mind, the observation checks used when moving off from the left will be reversed. The order is: right shoulder, right mirror, centre mirror, the road ahead, left mirror, left shoulder.
There are a couple of additional points to keep in mind.
Your centre mirror might not give a good view behind (because it is angled slightly to the right).
(Remember) If there is a parked vehicle in front of you, it will affect your view of the road ahead.
Also, take special care if vehicles parked on the left might intend to move off at the same time as you.
Unlike moving off from the left, you will almost always need to signal unless you are sure there is no one to benefit; this is because your view ahead and behind might not be as clear as when moving off on the left-hand side. The rule 'if in doubt, give a signal' is a good one to follow.

(Diagram point 4) Move back to the left-hand side of the road as quickly as possible, but without rushing. Check your mirrors and make sure that your signal is cancelled.

 Stop on the right Quiz ...
 Click here to complete the quiz for this lesson
(The page will open in a new window/tab)
You will find references for the answers in this lesson.
You can check your answers as you go along, or complete the full quiz before checking.
Leaving the check to the end is a good way to test yourself.
When you check or review your answers you will get a brief explanation of the answer.
Good Luck!