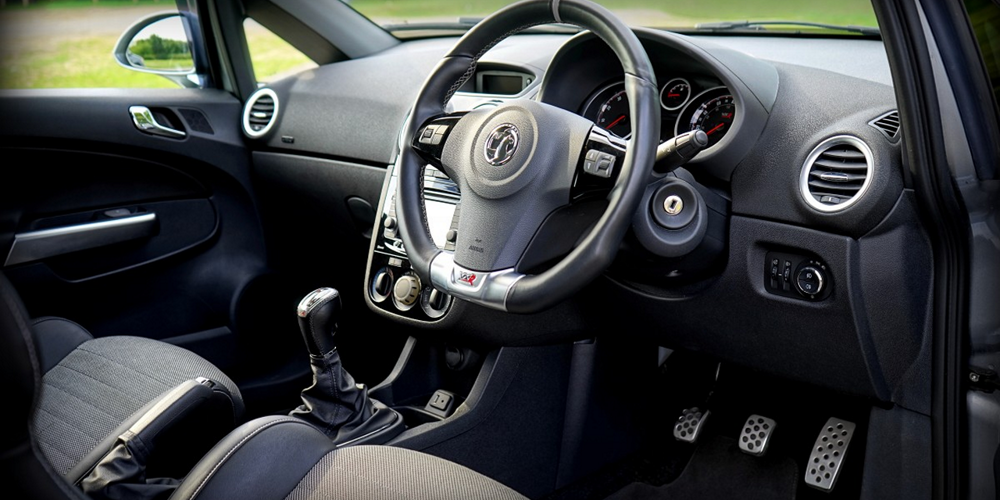
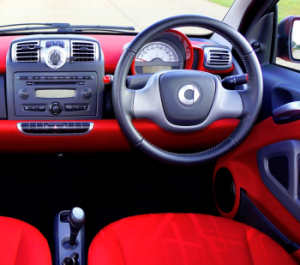
 OK, you're unlikely to be learning to drive in an old car like the one in the picture!
But just like the old car in the picture, the car you drive will have pedals, levers and switches, and you need to know what they are for and how to use them.
If you have never driven before, the 'controls lesson' is your introduction to the car and everything you will operate as a driver.
If you have driven before, your instructor will spend a little time finding out what you know and helping you to familiarise yourself with any differences between your tuition car and any other vehicle you may have driven.
The lesson will typically start with information about driver safety and responsibilities, including the basic drill that you do every time you get into the car (the cockpit drill).
You will also learn about the main controls used to drive the car and any other controls necessary for your lesson (for example, if your first lesson is at night, you will need to know how to switch the lights on).
You will usually learn how to move off and stop during your first lesson.
With most instructors, you will not learn all of the controls in one go on your first lesson - just those needed to get you started.
Some of the things in this lesson won't be covered because they are not available in your instructor's car. Other things will be covered as you progress with your lessons. For example, we've included a range of warning lights so you can learn as much as possible about other cars you drive or might drive in the future.
(2022) Most people still learn in cars with manual transmission (cars with a gear lever and a clutch), but there is a growing trend towards automatic transmission and electric vehicles.
People learning to drive today will almost certainly be driving an automatic or electric car in the future. In the UK and other countries, governments will ban the sale of new cars with petrol and diesel engines from 2030 – from that time onwards, all new cars will be automatics of one type or another. Second-hand petrol and diesel cars will still be available for a few years, but as the average life of a car is just under nine years, by 2040, almost everyone will be in an electric or second-hand Hybrid car.
Driving is about much more than simply operating the controls.
Safe driving is about planning, anticipation, knowing whether you are fit to drive, choosing routes to your location, looking after your vehicle and much more. The examiner wants to see a safe driver.
![]() The driving test examiner will want to see:
The driving test examiner will want to see:
Smooth and coordinated use of the pedals
Progressive use of the footbrake and accelerator
Proper use of the 'power' or 'go-pedal’ in an electric car
Proper use of the handbrake when required
A light but positive control of the gear lever engaging the appropriate gear for the situation (manual car)
Correct use of the gear selector in an automatic
Correct and appropriate use of auxiliary controls such as the indicator, windscreen wiper and other switches
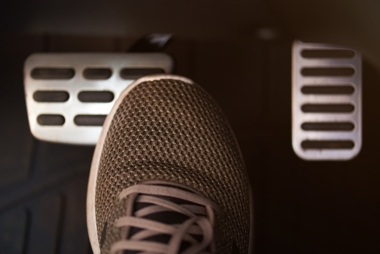 When driving, you use the foot pedals to control your speed and power.
Manual cars have three pedals: accelerator, brake and clutch; cars with automatics or semi-automatic transmission, hybrids, and electric cars, have only an accelerator* and a brake pedal.
The accelerator also performs an active braking function in hybrids and electric cars.
Some new drivers notice the first thing with a manual car is 'three pedals but only two feet' – but you don't need to grow another leg! Two of the pedals control the speed, one to make the car move and the other to slow down. You don't need them both at once.
Automatic cars have only two pedals, one to make the car move and one to make the car slow and stop – for these, you only need to use one foot as you can't do both things at once, so your left foot has nothing to do. However, some drivers use 'left foot braking' when doing very slow manoeuvres in automatic cars - there might be some cars where this would be appropriate, but we don't recommend it as a general rule.
Electric cars are like automatics in that they only have two pedals, a 'go' (or 'power') pedal and a footbrake. As with automatics, you only use one foot to drive.
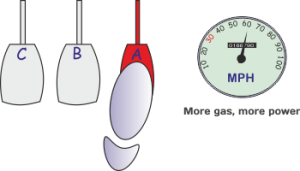
You operate the accelerator with your right foot to control the power from the engine. In an electric car, the right equivalent6 pedal controls the power from the electric motor(s).
When you press the accelerator or go pedal, the engine produces more power to make the car go faster or climb hills; releasing the pedal reduces the power and slows the car down (unless you are going downhill).
The 'go' pedal sends power to the wheels to speed up - but it also acts as a brake when you take your foot off it. When the accelerator acts as a brake, the motor generates electricity to top up the battery and extend the car's range - this is called ‘regenerative braking’ (this feature also applies to hybrid vehicles).
In a petrol or diesel car, your instructor may use 'gas pedal' when referring to the accelerator. This is done for ease of instruction and understanding – 'more gas' would mean press the pedal a bit harder, 'less gas', a little less. There is no abbreviation for the 'go-pedal’ in an electric car! Although some instructors will say 'more power' or less power' in their instructions.

Like the accelerator and go pedal, you operate the footbrake with your right foot.
The footbrake pedal operates brakes on all the wheels to slow, or stop, the car.
The footbrake switches on the brake lights so that drivers behind know you are slowing down.
When you start driving, you will learn about 'progressive braking'; this term refers to the controlled use of the footbrake to enable a smooth reduction of speed.
In electric and hybrid cars pressing the brake pedal also activates 'regenerative braking'.
Many electric cars allow 'one-pedal driving’. When the regenerative braking function is operating, it activates the brake lights to warn following drivers that you are slowing down. Because of the go-pedal's regenerative braking function, a skilled driver will rarely have to use the footbrake and it is used primarily as an emergency brake.
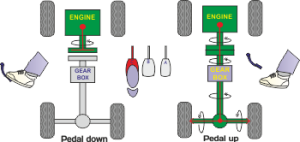
You operate the clutch pedal with your left foot.
Pressing the clutch down breaks the link between the engine and the driving wheels; this allows you to change gear and stop the car without stopping the engine.
As you bring up the pedal, you will hear a change in the engine sound when the engine starts to connect to the wheels. Most instructors refer to this as the 'biting' point.
The clutch pedal should always be fully released in normal driving (after you have moved off), with your left foot resting on the floor.
As soon as you have learned the basic skills of moving off and stopping, you will learn about 'clutch control' – a method to help control your speed during very slow manoeuvres.
The main hand controls are:
Steering wheel
Indicators
Gear lever (Selector in an auto and electric)
Handbrake
Of course, you operate other controls by hand, for example, the heater and de-mister controls. We call the controls above the 'main' hand controls because in the case of the steering wheel, gear lever/selector and handbrake, these are used directly to control the car. We have included the indicator switch because you will use this just about every time to drive.
The other controls help you communicate with other road users, see clearly, and maintain a comfortable environment - these include the horn, lights, de-misters, heaters, entertainment, and so on.
 The steering wheel turns the car to the left or right (obviously!) or keeps it in a straight line.
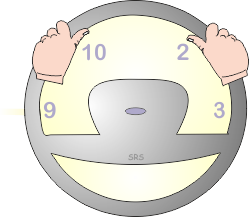
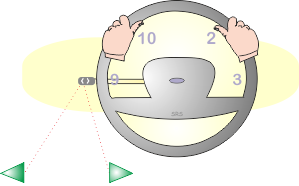
One of the best ways to remember where to position your hands on the wheel is to imagine a clock face.
Your hands should be horizontally opposite, with your left hand between 9 and 10 and your right hand between 2 and 3. Holding the steering wheel like this will usually give you maximum control over the car, especially in an emergency.
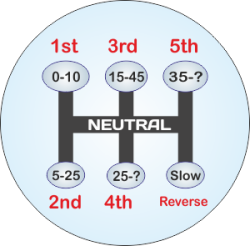
Most manual cars have five or six forward gears and one reverse gear.
Gears are used to drive at different speeds.
To change gear, you have to press the clutch pedal down and then move the gear lever - one of the most important things to learn about the gear lever in the early stages of driving is that you don't look at it - this is not because the gear lever is ugly! It's because you need to keep your eyes on the road.
Thinking of the gear layout for the first four gears as an 'H' shape will help you remember where they are. The position of reverse gear varies from car to car.
The speed you can drive in each gear will vary from vehicle to vehicle. For example, some sports cars can do 70 mph in second gear, but in most vehicles you drive, you will be changing up to second gear at 5 or 10 mph. The gear chosen at any speed will depend on how much power you need at that moment - it's easy once you get used to it! (Changing gear is covered in detail later in the programme.)
It can be helpful to sit in the driving seat of a stationary car, perhaps on a driveway or in the street at home, and practise moving the gear lever without looking at it. However, a word of caution - if you are on your own in the car and it is parked on a public road, do not put the keys in the ignition - if fact, leave them in the house - otherwise, you could be considered to be 'in control of a motor vehicle while unsupervised'.
If you pass the test in a semi-automatic, full-automatic or electric car, you will not be licensed to drive a manual car.
Some semi-automatic cars have a gear lever like a manual car. Some are fully automatic with an option to change gear manually* - neither have a clutch pedal - that bit is controlled automatically by the vehicle.
Most fully automatic cars have an option to select gears in a similar way to a semi-automatic.
The selector options are forwards, backwards, park and neutral. For now, you only need to know that you select 'forwards' to drive, and 'park' when the car is parked. (Later you will learn that you need to select reverse to reverse!) Electric cars don't have gears.
Cars with automatic transmission have gears, but the vehicle selects them automatically. The driver does not have to change gear.
The selector positions are usually Park, Reverse, Neutral and Drive. If you are learning in an automatic, for now, all you need to remember is to use Drive to go forwards and Park when the car is parked (you will learn more as your lessons progress).
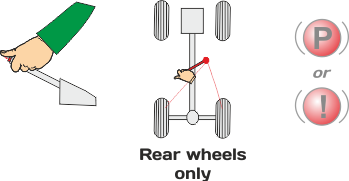
You use the handbrake to secure the car after it has stopped.
It might help to think of it as a parking brake. You must never use the handbrake when the car is moving.
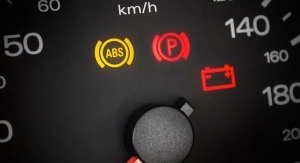
The 'traditional' lever-type handbrake is operated by pressing the 'release button' before applying or releasing the brake. A warning light shows that the handbrake is on, usually like one of those shown in the image.
Many cars now have an electronic handbrake operated by a switch mounted on the centre console.
There are two reasons for not using the handbrake when moving:
It only operates on two wheels (unlike the footbrake which works on all wheels) and braking two wheels could cause a skid.
Locked wheels are a dangerous problem when driving. Unlike footbrakes, handbrakes are not designed for progressive braking. The handbrake is either 'on' or 'off' with nothing in between; applying the handbrake when the car is moving can lock the wheels.
In addition to the handbrake, some cars with electronic handbrakes now have a 'brake hold' system. When the brake-hold system is activated, the brakes are automatically 'locked on' when you stop the vehicle with the footbrake. The brakes are released when the clutch is engaged in a manual car, or the accelerator is pressed in an automatic. This means that it isn't necessary to use the handbrake for temporary stops in traffic.
Similar systems are available in electric cars but have different names and vary in how they work - check out the vehicle handbook for details.
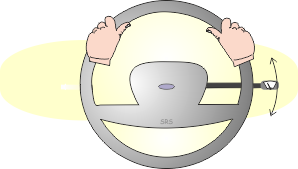
This switch is usually on a stalk behind the steering wheel and is 'fingertip-operated'.
The indicator switch activates the flashing indicators to the car's front, rear, and sides; you operate the switch by stretching out your fingers - there is no need to take your hand off the steering wheel.
Using the indicators well before you change direction will show other road users which way you intend to go.
Many cars have a 'three flash' setting. A quick touch on the indicator switch briefly causes the indicators to flash three times and then switch off. At DriverActive, we don't like this setting - three flashes don't usually give enough warning to other drivers. We recommend four or five flashes as a minimum - but you must take every situation as you find it. Sometimes, three flashes might be OK.
You will need to be familiar with the controls listed in this lesson to drive safely and pass your driving test.
But relax. You don't have to memorise every warning light shown in the lesson - but you must always know the lights for the vehicle you are driving.
Your car may have features that have not been listed here, for example, touch screen operated entertainment and navigation systems, cruise control, etc. You will find information about these things in the car's handbook.
You should also consult the handbook for details of any items listed in these 'controls' pages if you need more specific information.
Remember, your driving instructor will help you to understand and operate all of the controls in your tuition car.
The horn is often on the same stalk switch as the indicators, but some cars have the horn switch placed in the centre of the steering wheel.
Only use the horn to warn other drivers of your presence. Avoid using the horn when your car is stationary or in a built-up area at night.
Most cars are fitted with a heater and air conditioning to keep passengers comfortable. This system also directs air to the windows to prevent them from misting up.
The ventilation system usually has three switches or settings: these control the temperature, the 'blower' (fan) speed, and the airflow direction. By varying the settings, you can control the temperature inside the car. There will be a separate switch for demisting the rear, and sometimes the front, screens.
You operate the front wipers (and washers) by a fingertip stalk switch behind the steering wheel. Rear wipers are often controlled by the same switch.
Most modern cars have a two-speed setting and an intermittent setting. In some vehicles, the windscreen wipers come on automatically when a sensor detects that it's raining.
The switch for the hazard warning lights turns on all the indicators simultaneously; it is usually large and orange.
Hazard warning lights are not an excuse for bad parking! Hazard warning lights are not an excuse for bad parking! Only use them if your vehicle becomes an obstruction or danger on the road.
Even if you have been a regular passenger in a car, you may find that there are many switches and dials to think about when you first sit behind the steering wheel.
Over the years, more warning lights and gauges have appeared as new safety features have been introduced. This trend will continue as computer displays are now starting to appear in even the most basic model vehicles.
Different makes and models have different layouts and varying numbers of warning lights and accessory switches - when you get your first car, be sure to study the manufacturer's handbook and familiarise yourself with the layout.
The illustrated colours may be different from the colours of the actual warning lights and switch symbols in your car. But there is a basic rule that applies to warning lights.
Warning lights are red or amber. If a red warning light shows when you are driving, you should stop as soon as you can do so safely - red warning lights tell you that there is a significant problem. If an amber warning light shows, you can keep driving but should get the car checked by a mechanic as soon as possible; otherwise, you might end up with a breakdown or costly repair bill.
As mentioned earlier, your instructor won't usually cover all of the extra controls when first introducing you to the car. The reasons for this are:
You would have too much to remember
You could quickly become bored with so much theory
The sooner you can start driving the car, the better
Where appropriate, your instructors will cover the additional controls and warning lights shown in this lesson, including light switches, dashboard lights, dials, and other switches.
Light switches are in different places in different cars.
The switch is usually incorporated into the indicator stalk but is sometimes on the dashboard (front panel). However, it is likely to have two positions regardless of where it is.
The first position switches on the side lights (parking lights): In modern cars, the sidelights brighten up as soon you switch on the ignition; this setting, dim-dip, is automatic. Dim–dip lights are safer than sidelights when driving in built-up areas at night because they make your car easier to see.
The second position switches on the headlights (these can be dipped or full-beam).
In addition to the main light switch there is a 'dip' switch. This switch is almost always incorporated into the indicator switch.
The dip switch allows you to easily change from dipped beam (a short beam that won't dazzle other drivers) to full beam (a long beam for use on clear, open roads). The dip switch will also allow you to flash your headlights.
Other light switches might include front and rear fog lights and spotlights.
Front fog lights are primarily for use when driving in nighttime fog. They reduce reflection from moisture in the air, giving you better vision along the road's edge.
Rear fog lights are high-intensity red lights for use in very poor visibility. Take great care when using these lights because they can dazzle drivers behind you and mask the effect of your brake lights. Think of your rear fog lights as signals to let other drivers know you are there. As soon as there is a car close behind, switch them off.
You will see a range of warning lights on your instrument panel. These lights vary from car to car, and some vehicles have more than others.
Instrument lights come on when the ignition key is turned* to the second position - this shows you that the lights are functioning correctly. Some of the lights will then go off automatically as the car completes its diagnostic checks - others will go off when you start the engine.
The general rule is that the lights warn you about something; this could be a problem, for example, a fault with the engine or simply a reminder that something is or is not working correctly.
*Note: Some vehicles have 'key-less' ignition with ‘push-button start’; these do not need you to insert a key - see vehicle manual for information about specific models.
Ignition light (petrol and diesel vehicles):
 This red light shows that the ignition circuit has been activated.
When this light is on, all the electrical accessories will work. If this light comes on when the engine is running normally, it indicates an electrical problem that could lead to a loss of power, especially if the battery is not charging. Your car might seem OK but could fail at any point on a journey, leaving you stranded.
Oil warning light:
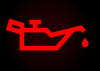 Your engine needs oil to run correctly; this is why checking the oil level in your engine is an essential weekly maintenance check. Low oil levels or oil pressure will affect the life of the engine and cause it to use more fuel.
If this red oil warning light comes on when the engine is running normally, it warns of low oil pressure. If you ever get this warning, you should stop as soon as possible or risk severe damage to your engine.
Brake warning lights:
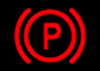

The handbrake warning light warns that your handbrake is on or not fully released.
The brake warning light shows a problem with the braking system. Park your car and call a mechanic; otherwise, your brakes could fail at any time.
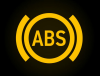
The ABS warning light shows a problem with the anti-lock braking system. You can drive temporarily with this light showing. Get the car checked as soon as possible - without ABS, you are at risk of skidding out of control under harsh braking, and you will be unable to steer around obstructions when braking in an emergency.
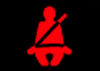
Seatbelt warning light:
This red light comes on if you, or one of your passengers, is not wearing a seatbelt. You are responsible for seatbelt use by passengers under 14 years of age.
You are not directly responsible in law for adult passengers who refuse to wear a seatbelt. However, your insurance company might deny a claim if the non-use of the seatbelt contributed to an accident or injury.
Get into the habit of always wearing your seatbelt and refusing to carry passengers who do not want to wear belts.

Full beam:
This blue light shows when your headlights are on full beam. When driving at night, it is essential to dip your headlights whenever another vehicle approaches so that you don't dazzle the other driver. It is equally important to avoid dazzling cyclists and pedestrians, especially on unlit roads.

Fog light warning
These lights show when your fog lights are on, usually amber for rear fog lights and green for front fog lights.
Use your fog lights in poor visibility; this is defined as less than 100 metres.

Make sure that you switch off fog lights when the visibility clears. It is an offence to use rear fog lights in good visibility - they can dazzle drivers behind at night and mask your brake lights both day and night.
Switching off rear fog lights when a driver follows close behind at night prevents dazzle - however, you must be ready to switch the lights back on if the following driver drops back a long way, turns off the road or stops.
Screen demisters:
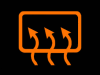
These lights are most common for rear screens and show when your de-mister is switched on. Some cars have heated windscreens and have a similar light for the front screen (symbols relating to rear screens are usually rectangular, for front screens, the rectangle has a curved top and bottom - making it windscreen shaped).
In cold or wet weather, the car windows often get misted up; your car has a de-mister system to avoid this problem. The windscreen de-mister is often an integral part of the heating system.
Rear screens and some front screens have electrically heated wires embedded in the glass. Many rear de-misters switch off automatically after a set period, but you should always check to ensure that they are not left on unnecessarily; the high power consumption could drain your car battery.

Diesel engine pre-heater
Diesel-engine cars have a ‘pre-heat’ system to help with cold starting. You should not start your engine until this light goes out. In key-less ignition cars with a push-button start, the vehicle will automatically handle this for you.
Indicator lights:
Most cars have green indicator warning lights for left and right signals to tell you that you are signalling; these help prevent indicators from being left on by mistake when the wheel doesn't turn enough to cancel them, for example, when changing lanes.
The indicator lights will flash at the same rate as the indicators themselves - if your indicator warning lights flash at 'double speed', it means that there is a problem, usually, that one of the indicator bulbs has failed. If this happens, find a safe place to stop as soon as possible and check the indicators. You can quickly check by switching on the hazard lights (all indicators at once) and getting out of the car to make a visual check.
The image below shows most of the dashboard symbols you are ever likely to see.
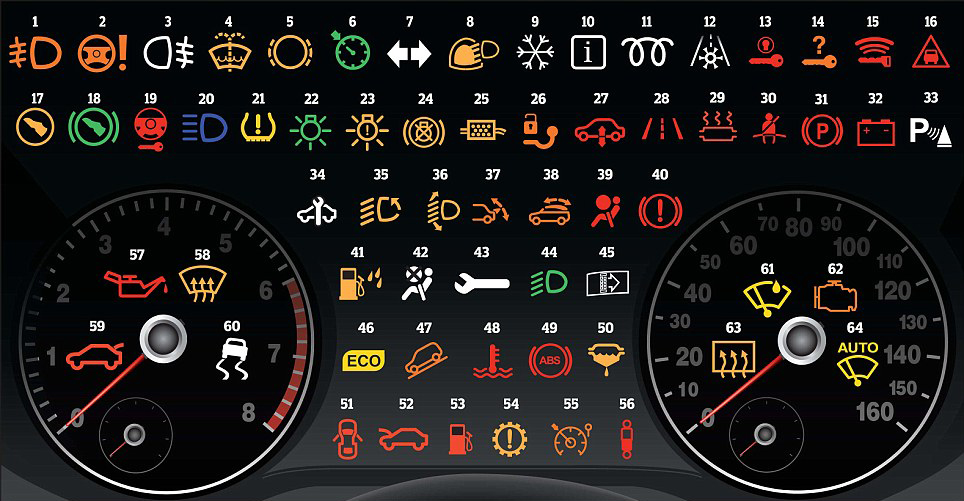
1. Fog light (front)
2. Power steering warning light
3. Fog light (rear)
4. Washer fluid low
5. Brake pad warning
6. Cruise control on
7. Direction indicators
8. Rain and light sensor
9. Winter mode
10. Information indicator
11. Glow plug/diesel pre-heat warning
12. Frost warning
13. Ignition switch warning
14. Key not in vehicle
15. Key fob battery low
16. Distance warning
17. Press clutch pedal
18. Press brake pedal
19. Steering lock warning
20. Main beam headlights
21. Tyre pressure low
22. Sidelight information
23. Exterior light fault
24. Brake lights warning
25. Diesel particulate filter
26. Trailer tow hitch warning
27. Air suspension warning
28. Lane departure warning
29. Catalytic converter warning
30. Seat belt not on
31. Parking brake light
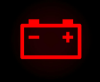
32. Battery/alternator warning
33. Parking assist
34. Service required
35. Adaptive lighting
36. Headlight range control
37. Rear spoiler warning
38. Convertible roof warning
39. Air-bag warning
40. Handbrake warning
41. Water in the fuel filter
42, Air-bag deactivated
43. Fault problem
44. Dipped beam headlights
45. Dirty air filter
46. Eco-driving indicator
47. Hill descent control
48. Temperature warning
49. ABS warning
50. Fuel filter warning
51. Door open
52. Bonnet open
53. Low fuel
54. Automatic gearbox warning
55. Speed limiter
56. Suspension dampers
57. Oil pressure low
58. Windscreen defrost
59. Boot open
60. Stability control off
61. Rain sensor
62. Engine/emissions warning
63. Rear window defrost
64. Auto windscreen wiping
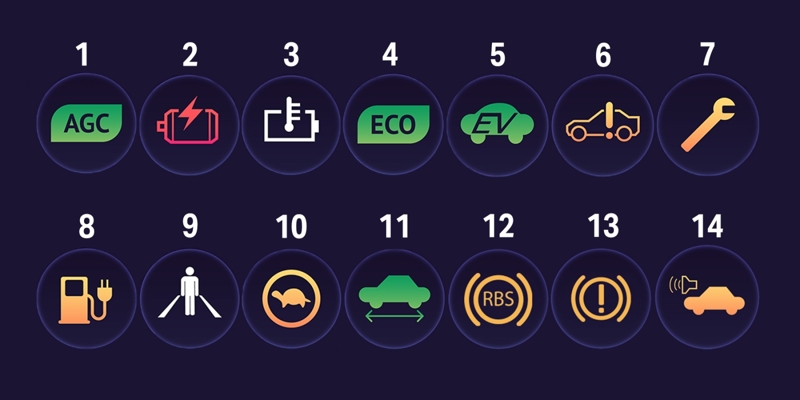
These are some of the typical warning lights that you will find in electric cars and hybrids. If you drive electric, see your car handbook or ask your driving instructor for a full explanation of the lights in your vehicle.
Auto Glide Control: Auto Glide Control helps reduce deceleration force in hybrids, allowing the vehicle to coast more while boosting fuel economy.
Battery Charge Level Warning: This symbol indicates that the charge left in the battery of a hybrid or electric vehicle is low, and the driver should charge back up soon. For hybrids, it also means the engine may have to take over until the battery can re-charge.
Battery Temperature Warning: This symbol will light up when the battery temperature is too high, like an overheated engine in a petrol or diesel car. Pull over ASAP to let the batteries cool off.
Eco Mode: When this symbol is illuminated, it indicates Eco mode. This means your vehicle will adapt to get the most miles out of the battery.
EV mode indicator: This indicates that a hybrid vehicle is currently running in electric-only mode.
General Electric Issue: This symbol means there’s an issue with the car’s electrical system.
General Issue: This means that their is a problem - you need a mechanic to check the car.
Low Battery: This is like a 'low fuel' light in a petrol or diesel car.
Pedestrian Warning: Electric cars are very quiet - pedestrians might not hear them. This system warns the driver of pedestrian risk - in some cars the brakes will apply automatically.
Limited Power: This warns of an issue affecting the available power - get the car checked over ASAP.
Ready to Drive: This tells you that your hybrid or electric car is ready to drive - unlike a petrol/diesel car there is no engine noise to tell you.
Regenerative Braking System: This shows that the regenerative braking system is active.
Regenerative Brake Warning: – This symbol will illuminate when the regenerative braking system is not working correctly - as with anything relating to brakes, get it checked out ASAP.
External Sound System Issue: An external sound system is used by electric cars and hybrids running on the battery to alert pedestrians that you are coming - it replaces 'engine noise' with an external speaker. If the symbol is lit up there may be an issue with the external speakers or the system itself.

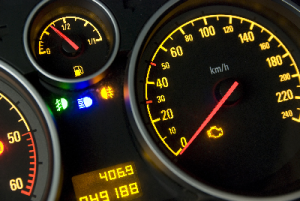
The instruments (or gauges) on your dashboard will give information essential for safe driving.
Speedometer:
The speedometer shows how fast the car is travelling. It is usually calibrated in miles per hour (MPH) and kilometres per hour (KPH). The speedometer also incorporates a mileometer (odometer) for logging the total number of miles that the car has covered in its lifetime.
Some speedometers also have a 'trip counter' for measuring the length of individual journeys.
Rev-counter:
The rev-counter looks like the speedometer, but instead of showing the speed of the car, it shows the speed of the engine. The rev-counter helps the driver monitor how hard the engine is working and ensures that there is no engine damage caused by over-revving (making the engine spin too fast). The rev-counter is calibrated in single units, each one representing 1,000 engine revolutions per minute.
In a manual car, you can use the rev-counter to help set the engine speed when moving off. In all vehicles monitoring and adjusting your engine speed can help save fuel (eco-driving).
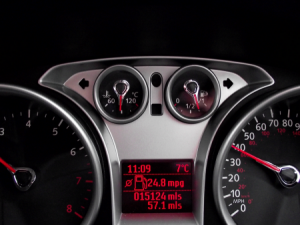
Temperature gauge:
Engines are designed to operate at maximum efficiency within a set temperature range. The temperature gauge shows the engine temperature. If your engine is too hot or cold, damage may occur, and fuel consumption will increase.
Oil pressure gauge:
The Oil pressure gauge has a similar function to the oil light. However, it gives more information, showing a reading for the oil pressure at all times. These gauges are most often found in sports cars.
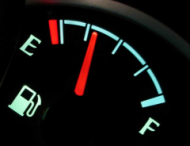
Fuel gauge:
The purpose of this gauge should be pretty obvious! It shows how much fuel you have in your tank. Figures by the Highways Agency in 2009 showed that more than 15000 motorists ran out of fuel on motorways in a single year! Running out of fuel can leave you in a dangerous position - get into the habit of checking the fuel level in your instructor's car; that way, you will develop a good habit that you can use in your own car after passing your test.
You should never let the fuel level in your tank get too low; this can lead to sediment from the bottom of the tank getting sucked into the engine, causing it to run unevenly (or even stop altogether).
Click here to complete the quiz for this lesson
 (The page will open in a new window/tab)
You will find references for the answers in this lesson.
You can check your answers as you go along, or complete the full quiz before checking.
Leaving the check to the end is a good way to test yourself.
When you check or review your answers you will get a brief explanation of the answer.
Good Luck!