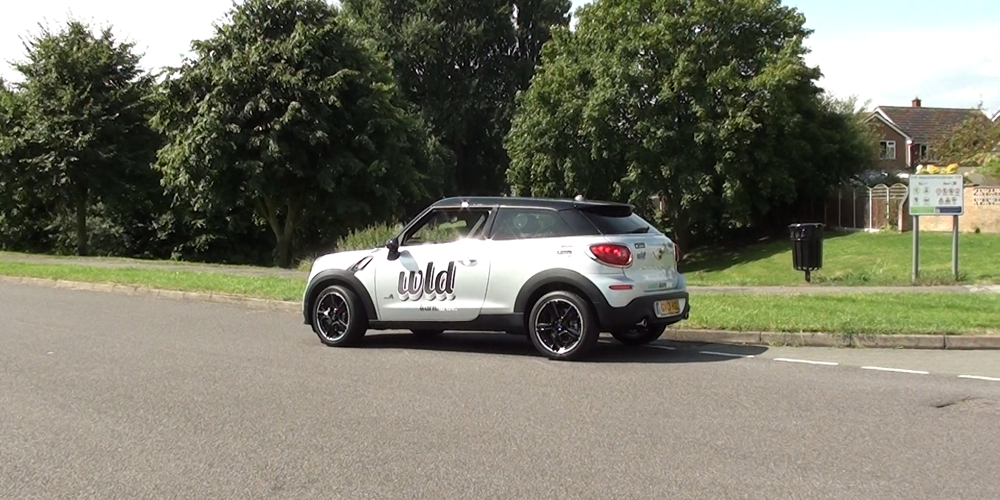
Reversing to the right is no longer included in the driving test. Even though this manoeuvre was an option for driving test examiners for many years, it was rarely tested - except in driving instructor tests.
 So why bother learning it?
Although your ability to reverse to the right won't be tested, being able to reverse to the left and right are essential skills in everyday driving.
You will need right-hand reversing skills when parking in car parks, reversing into driveways and in other similar situations. With this in mind, it's worth taking a little time to practise the manoeuvre - especially if you can practise with a parent or friend outside your driving lessons.
Learning this manoeuvre before reversing to the left or into parking bays also makes sense because it is easier - easier because you can see the kerb clearly as you reverse. This means you can practise all the control and observation skills needed to reverse before trying in a car park or tighter situations.
Mastering this manoeuvre (and the left-reverse) will be time well spent. It will develop your 'natural' reversing skills. In turn, this will make the driving test reversing exercises easier. And you will also have the skills to reverse safely in any situation after you have passed the test.
When doing this exercise, you will be the odd one out, which means that you must be fully aware of what is happening all around, all the time.
'OWL' like observation, keeping a constant lookout, is essential in this exercise because you will start on the 'wrong' side of the road.
While learning and when manoeuvring after you have passed your test, it's important to remember that all manoeuvres must be done in a safe, legal, and convenient location.
Safe means that you must not endanger yourself or others.
Legal means that you must not infringe any laws or drive carelessly or dangerously.
Convenient means that you must not cause undue inconvenience to others - remember, you are the 'odd one out' when manoeuvring.
Right and left reverse manoeuvres can be helpful if you go the wrong way by mistake - but if a safer option, such as driving around the block or a roundabout, is available, you should choose that method.
For well over 100 learning to drive videos visit Driving test Success. (Google Play | App Store - appstore practical videos available as an in app purchase in the 4 in 1 kit)
As with all driving manoeuvres, as mentioned earlier, you must make sure that you choose a safe, legal and convenient place to reverse. With this in mind, your location will avoid busy junctions, crossroads, schools, and so on.
Whether moving off from the left (as you would do when doing this manoeuvre during practise lessons) or simply driving along the road, you must take special care when crossing to the right-hand side of the road.
There is a potential problem - other road users might think you are turning right into the side road rather than pulling up just beyond it.
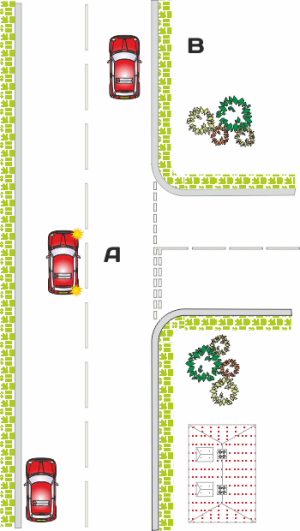
If moving off from the left (as shown in the diagram), ensure that you complete your usual safety checks before moving off.
You might think getting a reminder about your safety checks at this point in your training is a bit strange or unnecessary. After all, you've probably moved off 100 times or more and checking all around is obvious. But if you are busy focusing on the reverse manoeuvre, the obvious things can easily be missed!
Use your Mirrors, Signal Manoeuvre routine, but this time, instead of an early signal on the approach to the junction, you will be waiting until you are alongside the turn (Point 'A' on the diagram). This is to ensure that other drivers are not confused into thinking you are turning into the junction. It can sometimes be helpful to give a right-turn arm signal to emphasise that you intend to cross the road.
Have a good look into the 'target road' (or entrance that you intend to reverse into):
Is there enough space to reverse?
Are there any other road users to consider?
Will it be safe to complete the manoeuvre?
When it is safe to proceed, drive across the road just after point 'A' and pull up about half a metre from the kerb at point 'B' about three car lengths after the junction.
Make sure you make all your observation checks to see if the road is clear before starting to reverse, especially the left and right blind spots and that you are looking back (behind the car) before moving.
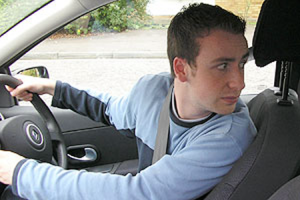
Looking back over your left shoulder for the straight parts of the reverse will allow you to glance to the front and give you a clear view to the rear.
Give way to traffic approaching from any direction.
In addition to your observation checks, you must complete your manoeuvre under full control and with reasonable accuracy. This typically means driving very slowly using clutch-control in a manual car (zimmer frame speed!). In an automatic, 'creep' might be sufficient, using the brake pedal for control. The slightest touch on the power pedal will be enough in electric cars (some electric cars have a 'creep' setting - see your car manual).
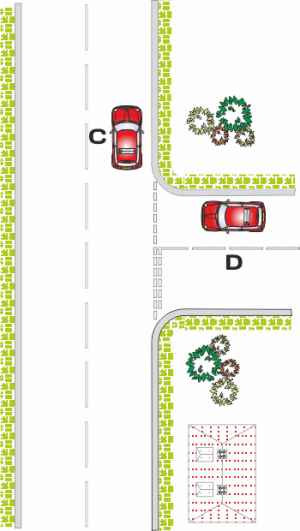
As you arrive at your turning point ('C' on the diagram), it will be easier to gauge your position if you look over your right shoulder (at the kerb).
Make sure that you look to the front before starting to steer. The front of the car will swing out and affect other traffic - be prepared to give way, even on a wide road. Finally, at point 'D', look back over your left shoulder as you reverse up the side road.
By observing this way and making frequent checks all around, you will cover the key 'danger' areas as you reverse.
Reverse along the new road for about five or six car lengths (look well back along the road for accurate steering). Reversing this far will enable you to safely return to the left-hand side without interfering with traffic turning at the junction.
1. Observation
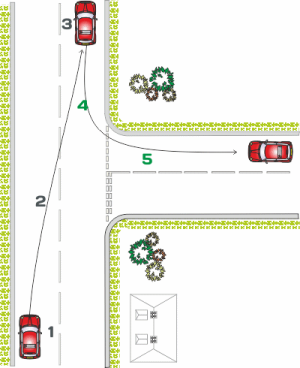
Full observation before moving off - remember that it's easy to forget the essential checks if you are concentrating on the fact that you are about to reverse.
You will need a little more time than you would typically need to move off because you will be driving slowly and possibly waiting for oncoming traffic before moving to the right-hand side of the road. Allowing extra time will minimise the risk of unnecessarily holding up other drivers.
2. Check the side road and signal
As you drive past the side road, glance across to ensure that it is safe to reverse; signal right to show other road users that you intend to move across to the right-hand side.
3. This is the start position for reversing
Park about 50 centimetres from the kerb. Check all around to make sure the road is clear, and start looking to the rear over your left shoulder before you begin to move.
4. Turning point
Check that the road is clear before starting to turn. Stop to give way to any other road users nearby. Switch your observation to your right shoulder to see the kerb more clearly.
Make repeated checks around as you turn the corner.
5. Final Straight
Switch your observation back to your left shoulder and reverse far enough to allow plenty of time/space to drive back across to the left-hand side of the road before the junction.

Click here to complete the quiz for this lesson
(The page will open in a new window/tab)
You will find references for the answers in this lesson.
You can check your answers as you go along, or complete the full quiz before checking.
Leaving the check to the end is a good way to test yourself.
When you check or review your answers you will get a brief explanation of the answer.
Good Luck!