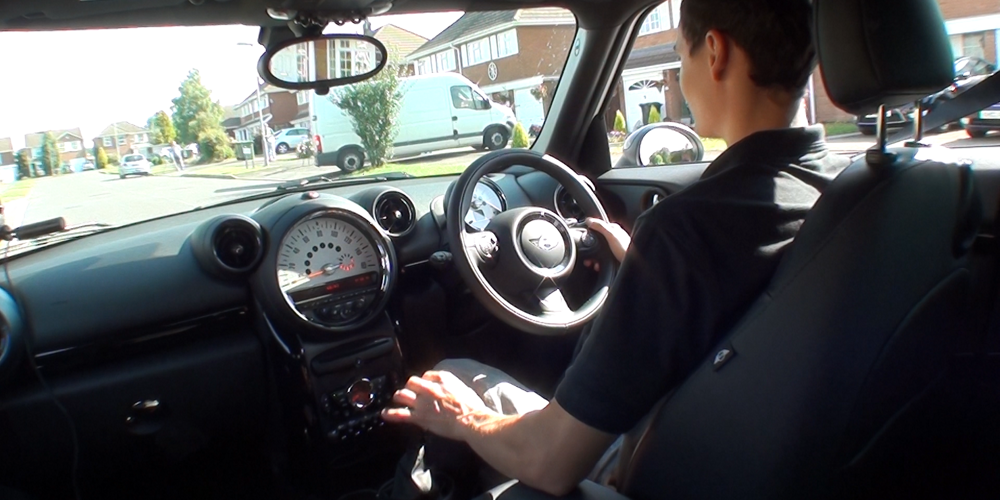
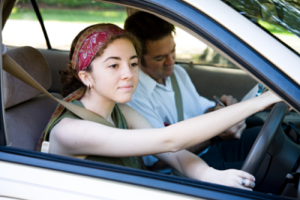
Driving involves some simple routines - the routines will help you develop good driving habits.
 The first routines that you will learn are designed to make sure that you remember the vehicle and safety checks when moving off.
The Prepare-Observe-Move method, often referred to as e 'POM' is a basic routine that will to help you to remember the steps needed to move off safely.
Prepare: Here you get the car ready by starting the engine, selecting the gear and lightly pressing the gas pedal.
Observe: This means just what it says! Look all around to make sure that it's safe to move and consider a signal to help/warn others.
Move: Drive the car to a safe road position.
You will need to practice this routine for as long as necessary to ensure that each aspect becomes 'second nature'.
In addition to moving off at the start of the test, you may have to move off on as many as six other occasions during the test, not counting normal stops in traffic and junctions.
The examiner might ask you to move off on a hill, from behind a parked car or from the right-hand side of the road, and you will also be demonstrating your skills when you move off after the parking manoeuvres. The examiner can also ask you to pull up and then move off at any time during the test.
The examiner will look for:
Good car control
Good use of mirrors
The appropriate blind-spot checks
Correct use of signals
Consideration for other road users
Your ability to move off without being hesitant
At the beginning of the test, the examiner will give general route instructions before asking you to move off. On later occasions, they will say, "Drive on when you are ready".
Click the play button below to listen to the driving test examiner's initial test instruction.
Although moving off in various situations is covered during the test, this section only deals with the basics - other situations are covered in later lessons.
When driving, you will need to know what is happening all around you - all the time.
The Wikipedia entry for rear view mirrors tells us that:
"The rear-view mirror's earliest known use and mention is by Dorothy Levitt in her 1906 book The Woman and the Car which noted that women should "carry a little hand-mirror in a convenient place when driving" so they may "hold the mirror aloft from time to time in order to see behind while driving in traffic", thereby inventing the rear view mirror before it was introduced by manufacturers in 1914.
Things have moved on a bit since 1914! All modern cars have three mirrors. - a centre (interior) mirror and two door mirrors.
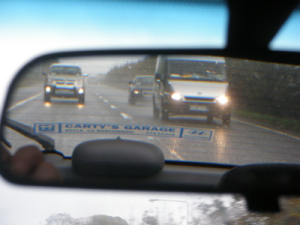
Before making a decision about your speed or position, you need to check the mirrors so that you know exactly where the traffic behind you is and how fast it's moving. If you see a problem behind, for example, a motorbike that looks like it's about to overtake you, you might need to change your plans.
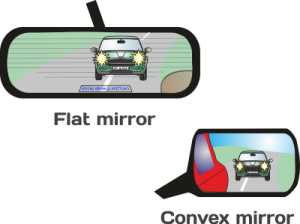
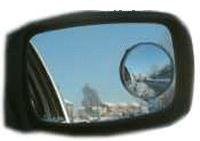
There are two types of mirrors fitted to cars – flat mirrors and convex mirrors. In most cars, the interior mirror is flat, and one or both of the door mirrors are convex.
Convex mirrors give a wider field of view than flat mirrors - this allows you to see a wider section of the road - but the image is slightly distorted.
When you see a vehicle in a convex mirror, it might look as though it's further away than it actually is. In the illustration, the image of the car behind is smaller in the convex door mirror - but it's the same car and the same distance away.
Because distance can be difficult to judge in a convex mirror, you should always use both your interior and door mirrors to get an accurate picture of traffic behind.
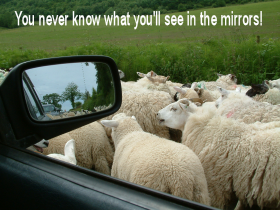
But your mirrors won't give the complete picture...
What you can't see in your mirrors is often just as important as what you can see.
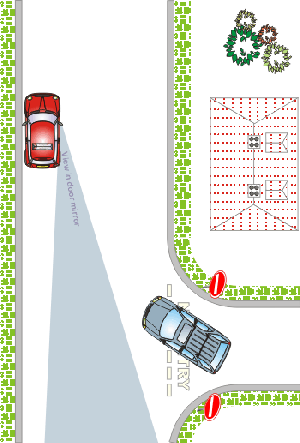
There are areas to the sides of your car that you can't see in your mirrors; we call these areas 'blind spots'.
The illustration shows the view from the driver's door mirror (shaded in blue). The driver won't be able to see the car emerging from the side road. The passenger side door mirror has similar limitations. Because of these limitations, you need to look around over your shoulder(s) to check for 'blind-spot-dangers' when moving off.
By glancing back over your shoulders, you will easily see vehicles and other road users that are not visible in your mirrors.
When checking blind spots, you only need to look to the sides and perhaps slightly back - it is not necessary to turn all the way around; doing this would simply show you what you have already seen in the mirrors.
 Many cars now have a 'split' driver's door mirror with a portion of the mirror designed to widen your view and show a part of the road that would otherwise be in your blind spot. You can also purchase small 'blind spot mirrors' to do the same job. But while they can be very useful, it's not a good idea to rely on blind spot mirrors alone. They do not give 100% cover and are often useless in wet weather when the rain can obscure the view.
Whatever mirrors are fitted to your car, you will always need to check blind spots when you are moving away from the side of the road.
When you get into any vehicle, especially if it has manual transmission, check that the handbrake is on, especially if it's parked on a hill; if the handbrake isn't on (or not on fully), the extra weight in the car could make it roll away. Granted, this is very rare – but the possibility is still there.
 After completing your cockpit-drill you will need to start the engine - or activate the electrical systems in an electric car.
The first part of preparing the car is starting the engine – or 'turning on' your electric vehicle to activate the systems.
Your handbrake should be on and:
in a manual car, the gear lever should be in the neutral position (where it moves freely from side-to-side)
in automatic or electric vehicles, the selector should be in Park (or neutral)
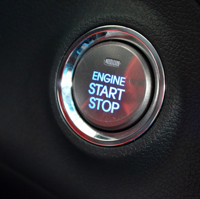
Manual/Automatic/Hybrid: After making the checks, you can start the engine by turning the ignition key or pressing the start button. In some cars, you will need to press the footbrake or clutch pedal before starting the engine.
The next step depends on the type of car you are driving.
With the parking brake (handbrake) still on, move the selector to the Drive position. That's it!
The car is now ready to move off, but you must first make sure that the road is clear and safe; this means checking for traffic and other road users and deciding whether you need to signal. Skip the rest of this page and move on to 'Observe'.
 In a manual car, you need to:
Select 1st gear
Set the gas
Find the clutch biting point
Select 1st gear
With the engine safely started, you are now ready to select 1st gear.
First, press the clutch pedal down to the floor.
It's essential to keep the clutch pedal pressed down while selecting the gear. Pressing the clutch down disconnects the engine from the wheels – if you don't keep it pressed down, the gear-lever might jam, or the car would jerk forwards.
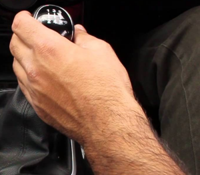
Next, select 1st gear by pushing the gear lever to the left and then sliding it forward.
Your instructor will show you how to use the 'palming' method to ensure that you always select 1st gear correctly. The palming method is not a compulsory 'style' of driving, but it can be helpful when you are first earning. Ultimately it doesn't matter how you hold the gear lever as long as you can select the gears easily without making mistakes.
Set the gas
Having selected your gear, your instructor will usually tell you to "Set the gas". This means 'press the accelerator very gently and then hold it still. ('set the gas is quicker and easier to say!).
Most engines will not have enough power to move off smoothly and efficiently at tick-over speed. By pressing the gas pedal gently, you will increase the power level sufficiently for a smooth start.

Set the gas by pressing the gas pedal gently to increase the engine sound and hold the pedal still.
The sound you want is often described as a 'lively even hum'. Some cars have a rev-counter (this shows the engine speed) - with a rev-counter, you can see when the engine power is sufficient.
The image shows a rev-counter - the approximate rev level will be around 2000 rpm when setting the gas (this means the engine is turning at 2000 revolutions per minute); however, this will vary from car to car. You will soon get a 'feel' for how much to press the gas pedal.
'Setting the gas' is a process you will always do before the car moves. As your skill develops, you will be able to do it instantly and instinctively as you bring up the clutch (see below).
Find the clutch biting point
So far, you've checked that the handbrake is on and that the gear lever is in the neutral position, started the engine, selected 1st gear and set the gas.
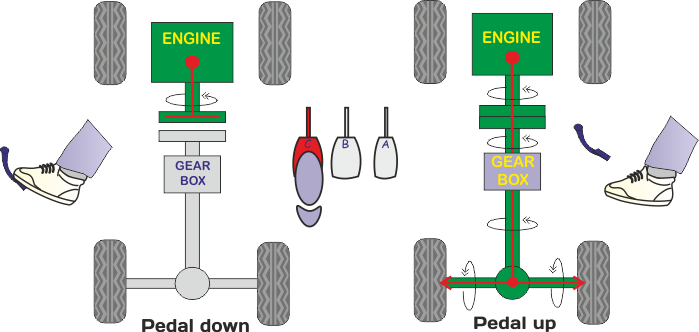
The engine is running, and the gear is selected, but you are not yet moving; this is because the clutch pedal is down. The engine is not connected to the wheels when the clutch is down, as shown in the diagram.
The next job is to start the process of connecting the engine to the wheels.
You connect the engine to the wheels by bringing up the clutch pedal. The clutch is brought up in two stages when moving off. The first stage is up to the 'biting point'; the second stage is when you fully release the clutch, removing your foot from the pedal.
The biting point is when you hear a drop in the engine note (and/or see the needle of the rev-counter drop); the engine is slowed down slightly at this point because the brakes are holding the car back as the engine tries to make it move.
The biting point is usually when the clutch pedal is about half way up.
Keep both feet still when you find the biting point; otherwise, the car might move forward prematurely, or the engine could stall (kangaroo petrol!). You will learn more about ‘clutch-control’ in the following few lessons. It will be the foundation for slow-speed manoeuvring.
The car is now ready to move off, but you must first make sure that the road is clear and safe; this means checking for traffic and other road users and deciding whether or not you need to signal.
When you become skilled at setting the gas and using the clutch, you will often do the 'Prepare' element of the POM routine at the same time as the 'Observation'.

Regardless of the type of car you are driving, you must make sure that it is absolutely safe by checking your interior mirror, the door mirrors, and your blind spots before you can move.
You have seen a diagram showing how a vehicle emerging from the side road on the right would be hidden in a driver's blind spot when moving off. By looking around, you will see the car emerging and can wait safely until the road is clear before starting to move.
But the right-hand blind spot is not the only place you need to check.
There could be vehicles approaching directly behind - you will see these in your centre and door mirrors. There could be a motorcyclist about to overtake you on the right - you will see them in the driver's door mirror. There might be kids (and adults) on bicycles that might pass you on the left - check your left door mirror.
Perhaps a less obvious place to check before moving off is the area over your left shoulder, the left blind spot. Children may be playing on the footpath; it only takes a moment for a kid on a skateboard, a scooter, or pedal car to be under your wheels.
And it's not only kids.
The diagram shows a car about to emerge from a driveway. That driveway is not visible in the mirrors.
Perhaps, obviously, you also need to check the front before moving.
By following a simple observation routine, the 'six-point check', you can make sure that you see everything likely to affect safety when your decision to move off.
The 'six-point check' method is an easy way to remind yourself of the areas you might need to check to ensure that it is safe to move.
This method is suggested as a guideline only; as you gain experience, effective observation will become habitual.
The areas where there may be things happening that would prevent you from moving off are:
Your left shoulder
The left door mirror
The interior mirror
The road ahead
The right door mirror
Your right shoulder
By checking these areas, you will know what is happening all around the car. However, there are some important points to consider.
'Nodding dog syndrome'
Some new drivers go through the motion of looking but see nothing; this happens when a learner does not fully understand what they are looking for or why they are looking - they are just doing it because their driving instructor told them to.
 How carefully do you check before crossing the road on foot, and what dangers are you looking for? The same rules apply when driving.
The most likely danger will come from moving motor vehicles, motorcyclists, and cyclists when you are moving off; these could be approaching from the front, the sides and the rear. You need to check all of these areas.
Looking too much
When moving off from the left, repeated and unnecessary left shoulder checks could mean that you miss safe opportunities to move because of the time spent looking around. The initial left blind spot check ensures no problems on the footpath, in a driveway or from any other opening immediately behind; when you are 100% sure that this area is clear, a left mirror check will usually be enough for any additional checks.
Problems can arise if you make repeated left shoulder checks or behave like a 'nodding dog', turning your head without seeing anything.
To avoid the potential problems above, follow these simple guidelines.
Make your initial check all around (a comprehensive look covering all six points). If the road is clear, move off.
If the road is not clear, but only one or two vehicles are approaching, a further two-point check starting from the driver's door mirror may be sufficient (be aware of the road to the front, especially if there are pedestrians about).
If you have to wait five or six seconds, start a four-point check from the centre mirror (mirror, ahead, door mirror, shoulder).
If the road is still not clear after 10/15 seconds, check all around again (six points).
Using this approach, you will be fully aware of traffic movement and ready for the kids who whizz along the footpath on skateboards, scooters, etc. Remember that the reason for your observation before moving off is to ensure that you won't endanger anyone - this means being aware of what is happening all around you.
By making the checks suggested above, you will know what is happening all around the car; you now need to decide whether or not to give a signal. You can't make this decision before checking your mirrors because you need to know who will be affected by your signal.
 You will only signal to move off when it helps or warns another road user. Don't signal out of habit simply because you are moving off.
Habitual unnecessary signals can cause problems. If there is no one to benefit from your signal, it will be a waste of time. By signalling out of habit, you run the risk of (eventually) forgetting the necessary observation checks.
You might need to signal for pedestrians, cyclists, opposing drivers, drivers emerging ahead or traffic behind - in fact, for anyone who will benefit!
Signal warning!
Take care not to mislead others with signals; for example, sitting with your signal flashing while several cars pass could be confusing for other drivers.
Mistimed signals can also be dangerous; for example, putting on your signal just as a cyclist or motorcyclist is about to ride past could startle them into braking hard or swerving.
You have prepared the car, made your observation checks and determined whether you need to signal. Now it's time to get moving.
When you are sure it's safe to move away, release the handbrake and gently press the gas/power pedal.
Steer gently to the 'safety line' (see below).
The first job is to release the handbrake.
The car should not move when you release the handbrake. If the car moves, the clutch pedal is up a little bit too far.
Bring the clutch pedal up a little bit - in some cars, it will be enough to ease the pressure on the clutch, with the pedal barely moving. As the car starts to move, keep the clutch still for a moment, this will help you to move off smoothly.
As the car begins to increase speed, bring the clutch up fully and press the gas pedal a little more.
Turn the steering wheel slightly and move out to the 'safety line' (see below).
Gently increase the pressure on the gas pedal, bring the clutch up fully and rest your left foot on the floor.
The first thing you need to know about the safety line is that it doesn't exist. You imagine it!
The safety line is an imaginary line that you will follow to keep your vehicle approximately one metre from the side of the road and any other obstruction.
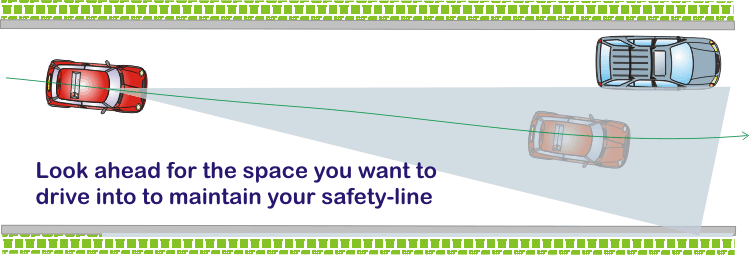
If you encounter a parked vehicle or other obstruction, you need to position yourself early. The best way to judge your position on the road is to look well ahead of the car - at least 50 metres. To do this, you have to 'aim at the space'.
There is a temptation for some new drivers to look at the front corners of the car to see where they are positioned on the road, but this actually makes judging your position much more difficult.
Your brain needs to get 'the big picture' gained from looking ahead to gauge your position accurately.
You might be surprised at how little you need to turn the steering wheel to move out to your safety line. Often, moving the wheel by a few centimetres will be plenty.
To steer a steady course, look well ahead, imagine where you want your car to be in 50 metres, and then aim for that space. If you need to pass an obstruction, for example, a parked car, look ahead to the space you intend to drive into and then concentrate on that space as you approach. By the time you arrive at the obstruction, you will be looking ahead to the next space well beyond it.
When you look at the kerb or any other obstruction, you will be drawn towards it; it's important to concentrate on the spaces you want to drive into; later, you will learn the simple steering rule of 'Aim at what you want to hit'.
At this point it might seem as though there is a lot to remember so far in this lesson, especially if you are learning to drive a manual car.
The good news is, you don't need to 'consciously' remember every detail; just relax and practise.
With your instructor's help, you will soon develop a safe moving off habit, and all of the stuff in the Prepare, Observe and Move routine will only take about ten seconds to complete.
You are on now well on target to becoming a driver!

Click here to complete the quiz for this lesson
(The page will open in a new window/tab)
You will find references for the answers in this lesson.
You can check your answers as you go along, or complete the full quiz before checking.
Leaving the check to the end is a good way to test yourself.
When you check or review your answers you will get a brief explanation of the answer.
Good Luck!